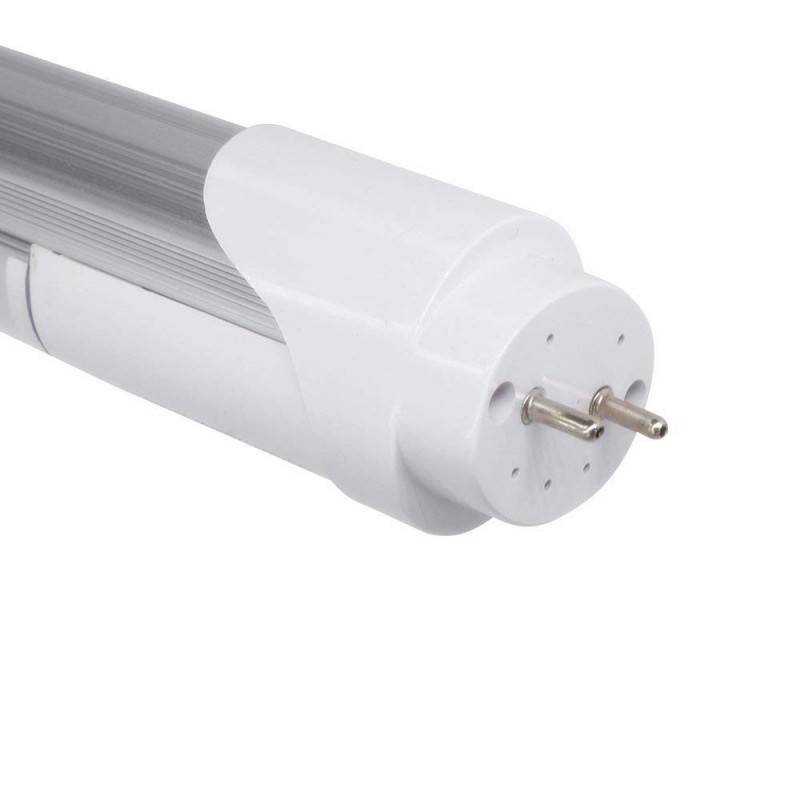
120cm T8 LED Tube 18W with microwave proximity sensor Cool White 6000K opal
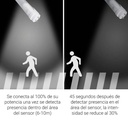
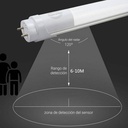
The T8 LED Tube with Microwave Proximity Sensor integrates a presence and proximity sensor, which detects when an object or person approaches at an approximate distance of 6-10 meters. The microwave sensor activates the tube to operate at its maximum power. Once the area of the LED Tube is vacated, after 45 seconds, it reduces its brightness to 30% of the total, providing a courtesy light that is more than sufficient with minimal consumption.
The number of starts has no effect at all on the life of the tube, 25,000 hours.
Ideal for parking lots, basements, schools, offices, restrooms, and any other area that needs lighting for extended periods of time.
Considerations to take into account with the LED T8 tube with microwave proximity sensor:
- Do not place any metal objects in front of the sensor as it may interfere with its operation.
- Ensure a distance of at least 5 meters between tube and tube, as interference may occur between them.
REPLACE CONVENTIONAL 60 CM FLUORESCENTS.
- AC input voltage of 230V
- Constant operation in standby mode at 30% of its power
- Microwave sensor range: 6-10 meters
- High power factor of up to 0.98
- Wide beam angle (180º)
- Opal cover that does not cause glare
- Short circuit and overheating protection
- Includes bridge for starter
INSTALLATION ON FERROMAGNETIC BALLASTS:
STEP 1: Turn off the general electrical panel light and verify that there is no electrical current.
STEP 2: Remove the old tube and then the starter.
STEP 3: Install the new LED starter bridge (included with each tube).
STEP 4: REMOVE THE CAPACITOR (TO AVOID OVERVOLTAGES)
STEP 5: Install the new LED tube.
INSTALLATION ON ELECTRONIC BALLASTS:
STEP 1: Turn off the main electrical panel and verify that there is no electrical current.
STEP 2: Remove the old tube (in this case, there is no starter, as it is integrated within the electronic ballast).
STEP 3: Disconnect the wires that enter the electronic ballast (it is not necessary to remove it, just disconnect it electrically).
STEP 4: Choose one of the 2 lamp holders to connect its 2 wires directly to the electrical network.
STEP 5: We recommend labeling the lamp holder where the connection has been made to facilitate the installation of the LED tube.
- IF THE INSTALLATION CONTAINS A CAPACITOR BATTERY, CONSULT YOUR SPECIALIZED TECHNICIAN.